
Upcycled ingredients are not only great for the environment but also for your taste buds! Today, you’ll be amazed at how delicious and healthy a simple banana ice cream can be. No need for an ice cream maker or fancy ingredients – just your ripe bananas and a few other pantry staples. Follow these easy steps, and soon you’ll be enjoying a creamy and flavorful treat that you’ll want to make again and again.
Key Takeaways:
- Easy and Fun Recipe: Making DIY upcycled banana ice cream is a simple and enjoyable way to create a sweet treat at home.
- Reduce Food Waste: This recipe helps to minimize food waste by using overripe bananas that might have otherwise been discarded.
- Healthy Alternative: Upcycled banana ice cream is a nutritious and natural alternative to store-bought ice cream, as it only contains bananas and optional mix-ins.
Gathering Ingredients
Choosing the Right Bananas
The first step in making your delicious DIY upcycled banana ice cream is choosing the right bananas. Look for ripe bananas that are slightly brown and speckled on the skin. These bananas will be sweeter and creamier than green or yellow bananas, adding a rich flavor to your ice cream.
Selecting Additional Ingredients
When gathering ingredients for your upcycled banana ice cream, you’ll need a few additional items to enhance the flavor and texture. Consider adding ingredients such as vanilla extract, honey, or nut butter to elevate the taste of your ice cream.
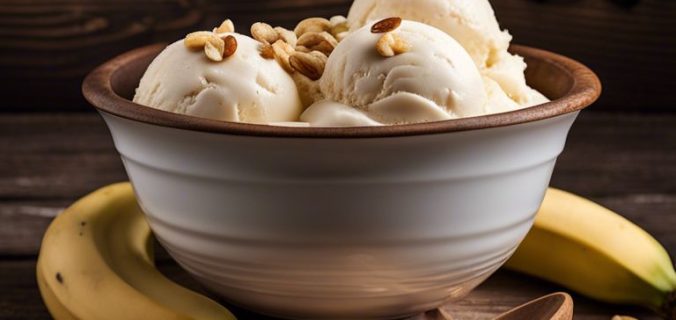
To enrich the flavor profile of your banana ice cream, you can also incorporate toppings like crushed nuts or chocolate chips. These additional ingredients will not only add a delightful crunch but also enhance the overall indulgent experience of your homemade dessert.
Preparing the Bananas
While making upcycled banana ice cream, the key ingredient is, of course, the bananas. Here’s how you can prepare your bananas for this delicious treat.
Freezing the Bananas
One of the first steps in preparing your bananas for ice cream is to freeze them. This step is crucial as frozen bananas will give your ice cream that creamy texture without the need for dairy. Simply peel ripe bananas, cut them into chunks, and place them in an airtight container in the freezer. Make sure to leave them in the freezer until they are completely frozen, typically overnight.
Peeling and Slicing the Frozen Bananas
With your frozen bananas ready, it’s time to peel and slice them for blending. Remove the frozen banana chunks from the freezer and let them sit for a few minutes to slightly thaw. Once they are slightly softened, use a sharp knife to peel off the skin. Be careful as frozen bananas can be a bit tricky to peel. Once peeled, slice the bananas into smaller pieces to make blending easier.
Preparing the bananas is a crucial step in making upcycled banana ice cream. By freezing, peeling, and slicing the bananas correctly, you ensure that your ice cream will turn out smooth, creamy, and delicious. Take your time with this step to get the best results for your homemade treat.
Creating the Base
Blending the Bananas into a Creamy Base
Unlike traditional ice cream recipes that call for heavy cream and sugar, you’ll be amazed at how simple and healthy it can be to whip up your own upcycled banana ice cream. With just a few ripe bananas, you can create a creamy base that will rival any store-bought treat. Simply peel your bananas, slice them into chunks, and freeze them until solid.
Adding Natural Sweeteners and Flavorings
Sweeteners and flavorings are where you can get creative with your upcycled banana ice cream. Instead of loading up on processed sugars, consider using natural sweeteners like honey, maple syrup, or agave nectar. These options not only add a touch of sweetness but also bring unique flavors to your frozen treat. You can also amp up the taste with ingredients like vanilla extract, cocoa powder, or even a sprinkle of sea salt for a gourmet twist.
Base: Experiment with different combinations to find your perfect flavor profile. Be mindful of, the beauty of making your own ice cream is that you can control the ingredients and tailor the recipe to suit your preferences. Have fun with it and don’t be afraid to taste-test along the way!
Mixing and Churning
Once again, prepare to launch on the magical journey of transforming your banana mixture into a delightful ice cream. This step involves mixing and churning, where you’ll bring all the flavors together to create a decadent treat that will satisfy your sweet cravings.
Combining the Base with Mix-ins and Toppings
Base: Take your chilled banana mixture and combine it with your favorite mix-ins and toppings. Whether you choose chopped nuts, chocolate chips, or swirls of caramel, the possibilities are endless. Mix everything together gently to ensure an even distribution of flavors throughout the ice cream.
Churning the Mixture into a Creamy Ice Cream
With your mixed base and toppings ready, it’s time to churn the mixture into a creamy ice cream. You can use an ice cream maker for this step, following the manufacturer’s instructions. The churning process incorporates air into the mixture, giving it that light and creamy texture we all love in ice cream.
Into the ice cream maker, pour your banana mixture and let it churn away until it reaches the perfect consistency. This process typically takes around 20-30 minutes, but be cautious not to over churn as it may result in a firmer texture. Keep an eye on the mixture as it transforms from a liquid to a luscious ice cream that will leave you craving for more.
Customizing Your Flavor
All the fun in making your own ice cream comes from customizing the flavors to suit your taste. Here are some ideas to help you elevate your upcycled banana ice cream:
Adding Cocoa Powder for a Chocolatey Twist
The next time you whip up a batch of banana ice cream, consider adding a spoonful of cocoa powder to the mix for a rich, chocolatey flavor. This simple addition will take your dessert to the next level, satisfying any chocolate craving you might have. Just mix in the cocoa powder with the frozen bananas and blend until smooth. You can adjust the amount of cocoa powder based on how intense you want the chocolate flavor to be.
Incorporating Nuts and Seeds for Crunch and Texture
For a delightful twist on your banana ice cream, try incorporating chopped nuts and seeds into the blend before freezing. The added crunch and texture from nuts like almonds, walnuts, or seeds like chia or flaxseed can create a more interesting and satisfying dessert. Simply sprinkle the nuts and seeds into the mixture as you blend the frozen bananas. You can also sprinkle some on top as a garnish for an extra crunch.
Chocolatey additions like cocoa nibs or chopped dark chocolate can also be mixed in for a decadent touch that pairs perfectly with the creamy banana base. When incorporating nuts and seeds, make sure to consider any allergies or dietary restrictions your guests may have.

Tips and Variations
Not only can you enjoy this DIY Upcycled Banana Ice Cream on its own, but you can also get creative with various tips and variations to suit your taste preferences. Here are some ideas to enhance your homemade treat:
- Add a sprinkle of cinnamon or nutmeg for a warm and flavorful twist.
- Top your ice cream with chopped nuts or chocolate chips for added crunch and indulgence.
- Drizzle honey or maple syrup over the ice cream for a natural sweetener.
- Try mixing in vanilla extract or almond extract for a burst of flavor.
Any time you want to learn more tips and tricks for making homemade ice cream, check out this fantastic Homemade Banana Ice Cream Recipe for inspiration!
Using Different Types of Milk and Creamers
On your ice cream-making journey, you may experiment with using various types of milk and creamers to achieve different textures and flavors. Here’s a breakdown of some options:
| Milk/Cream | Result |
| Whole Milk | Creamy and rich |
| Coconut Milk | Light and tropical |
| Almond Milk | Nutty and delicate |
| Heavy Cream | Decadent and velvety |
| Condensed Milk | Sweet and luscious |
This variety allows you to customize your ice cream to your liking, so feel free to explore and find the perfect combination for your taste buds!
Experimenting with Spices and Herbs
Spices and herbs can elevate your DIY Upcycled Banana Ice Cream to a whole new level of flavor complexity. Whether you prefer a hint of cayenne pepper for a spicy kick or fresh mint leaves for a refreshing twist, the possibilities are endless.
Another way to enhance your frozen treat is by infusing the base with lavender or rosemary for a floral essence that will surprise and delight your taste buds.
Creating a Dairy-Free Version
Spices and herbs can add depth and dimension to your dairy-free version of banana ice cream, making it just as delicious as the traditional recipe. By using ingredients like coconut cream or almond milk and experimenting with flavors such as ginger or cardamom, you can create a satisfying dairy-free dessert.
To wrap up
Ultimately, creating your own upcycled banana ice cream is a fun and delicious way to reduce food waste in your home. By using overripe bananas that would have otherwise been thrown out, you can whip up a creamy and satisfying treat that the whole family will love. The simplicity of this recipe makes it accessible to even the most novice of chefs, so don’t be afraid to give it a try!
FAQ
Q: What is the benefit of upcycling bananas for this recipe?
A: Upcycling bananas reduces food waste and allows you to use overripe bananas that might otherwise be thrown away. It’s a sustainable way to create a delicious treat.
Q: Can I use frozen bananas for this ice cream recipe?
A: Yes, frozen bananas work well for this recipe. Simply peel ripe bananas, cut them into chunks, and freeze them in a freezer-safe container before blending them into ice cream.
Q: Are there any variations I can try with this DIY banana ice cream recipe?
A: Yes, you can customize your banana ice cream by adding ingredients like peanut butter, chocolate chips, nuts, or a splash of vanilla extract for different flavors. Get creative and experiment with various toppings to make it your own!